Everyone else is putting their art on the blockchain – why not you? Learn how to make your own NFT Collection, the easy way, on Opensea
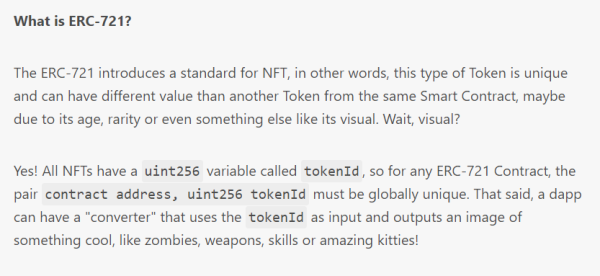
Welcome back! When we left off in Part One of this series on NFT history and basics, Curio Cards & Punks had led the way in innovating on Ethereum, and in January 2018 the ERC-721 standard was proposed.
So this is where we get that non-fungibility that we talked about, last time. Before, tokens were created by contracts to be fungible. Each one was functionally the same as any other.
The early “NFT” games got around this, usually, by making semi-identical individual contracts for each and every image/NFT (see: original Curio Cards). If that had been the method during the “NFT Summer”, the gas cost of deploying the contracts would’ve driven most folks into the poorhouse. ETH was cheaper in the early days, though.
Making Your Own Collection (Easy Mode)
OpenSea
So, Opensea tends to be everyone’s first stop for NFTs, and creating them is no exception. I personally prefer the business model of other markets, such as LooksRare, but they utilize Manifold for NFT creation, so I wouldn’t necessarily say it’s a feature the platform offers natively.
I would be remiss to not also mention Rarible, as they offer creation collection natively, or the ability to mint to their platform collection, instead. If there’s enough interest, I’d be more than happy to create a future article in this series on how to mint via Rarible, as they do tend to have a few more options, overall. Just let me know!
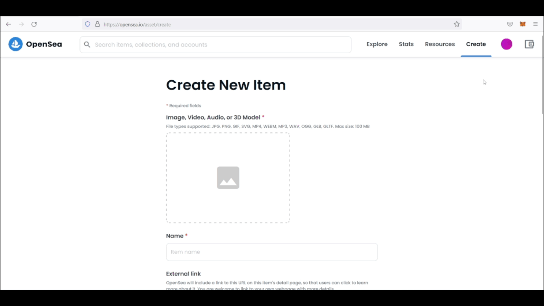
As you’ll see in the gif above, you can create individual items at-will on Opensea, but you’ll also need to create a collection to set up all of the functions like royalties, social links, etc.
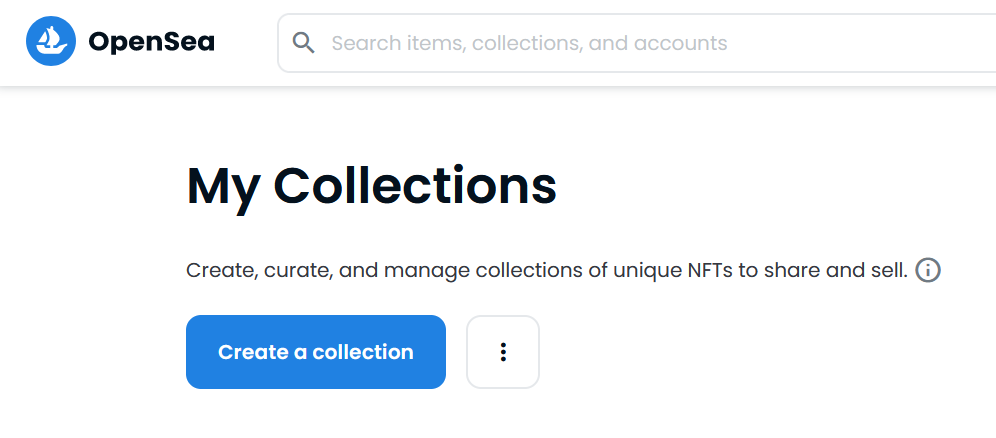
To start creating a collection, you’ll want to click the circle in the top-right corner of the screen, which represents your account.
From there, you’ll select My Collections from the drop-down menu, and then click the Create a Collection button.
This will bring you to the main collection creation screen, where you can set up everything related to the collection as a whole, rather than the individual NFTs within the collection.
Let’s go down the list real quick, and see what we’ll need to fill out.
NFT Collection Creation Checklist
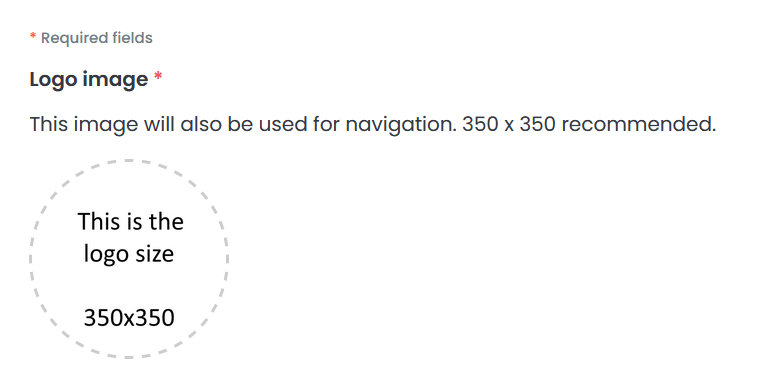
Logo image: The recommended size is 350×350. This will be the logo used in navigation, and may crop around the corners on some displays. It’s the smaller default image. This can be a gif, by the way, so you can absolutely have a logo with some animated flair.
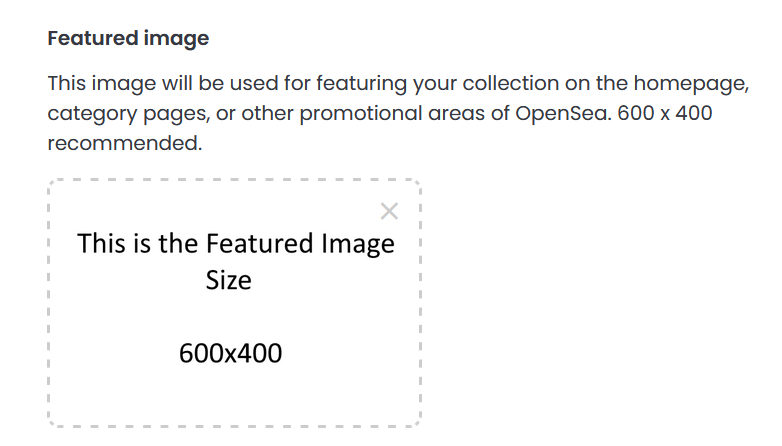
Featured image: The recommended size is 600×400, and you’ll see this image featured prominently on the collection’s page, and in other areas. This, pretty much everything else, can also be a gif. Have fun with it, if you really want your collection to stand out.
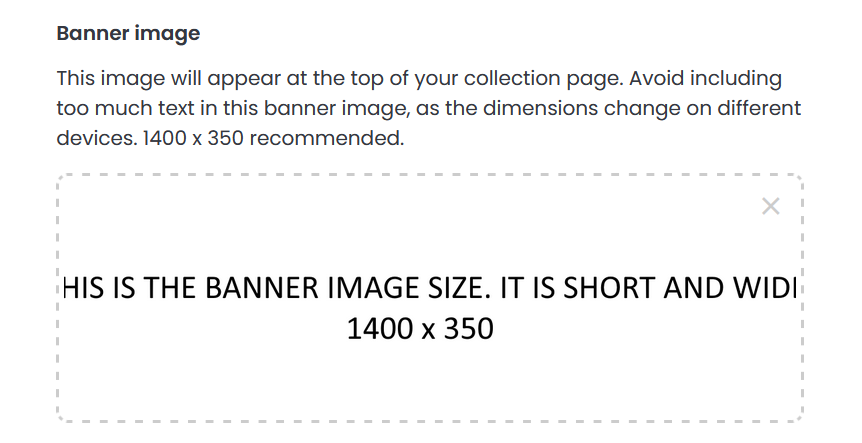
Banner image: The recommended size is 1400×350, but this is a bit misleading. As you’ll see in the below example, I actually used an image with a canvas size of 1400×350, and wasn’t even that close to the edges.
That said, it still cropped out the margins pretty handily on both the left & right sides, so you’ll want to really pay attention to how close you’re getting. Again, this can be a gif. Have fun. That’s what we’re here for.
Name: I believe this is pretty self-explanatory. I will say that NFT folks really seem to dig alliteration in their collection names. Not always, but Pudgy Penguins comes to mind as a prominent example.
URL: This will be where your collection resides on Opensea. It should probably be pretty close to your collection’s name, if it’s available. If it isn’t, you may have some branding issues to think about.
Description: Okay, this is where you can really shine, if you just get creative. This is where you’d describe your collection, and a lot of folks leave it at that. I would suggest, however, looking at the markdown syntax list.
This is enabled on OpenSea, so you can add some flair to your description, with bold, italics, subscript, superscript, and all sorts of fun ways to make your project’s description stand out from the crowd.
Category: Here you’ll select a category for your NFT, to briefly tell folks what it’s all about. The categories are pretty self-explanatory, except maybe Utility. There’s some definite overlap between some, like “Collectibles” and “Trading Cards”, so it’s mostly about how you define the scope of your collection.
Links: This is where you’ll add links to any of the socials that you’ve set up for this collection & the huge, active community you’re bound to have after selling out. You don’t have to fill all of these out, now, as they can be edited later, but it might be a good idea to go ahead and start locking down the account handles, channels, or subreddits on all of these platforms early to avoid fake pages or socials sprouting up as easily.
Creator earnings: Here you can specify an address for royalties to go to, as well as a %. Just understand that this is taken from every sale, and can be a disincentive to trading if users feel it is unduly high.
Blockchain: Currently, your options are Ethereum (mainnet) or Polygon, although Klaytn and Solana seem to be in the pipeline. Polygon is cheaper for all involved, but has less overall volume at present & NFTs will frequently show up as “Hidden” in wallets unless manually unhidden, due to the proliferation of “airdropped” Polygon NFTs with malicious links or piggybacked code.
As a result, it can be hard to pick up steam early on if you’re launching on Polygon, but if you have a good idea & are actively marketing it, it is still an achievable goal, and likely better for collections aiming for a lot of trades or a low price point at launch.
Payment tokens: ETH or Wrapped ETH is generally the default, although you can add more than a few different tokens (especially on ETH mainnet) as possible payment options. In practice, this makes more sense on Polygon or other blockchains, as the cost on Ethereum mainnet likely outweighs any convenience or novelty.
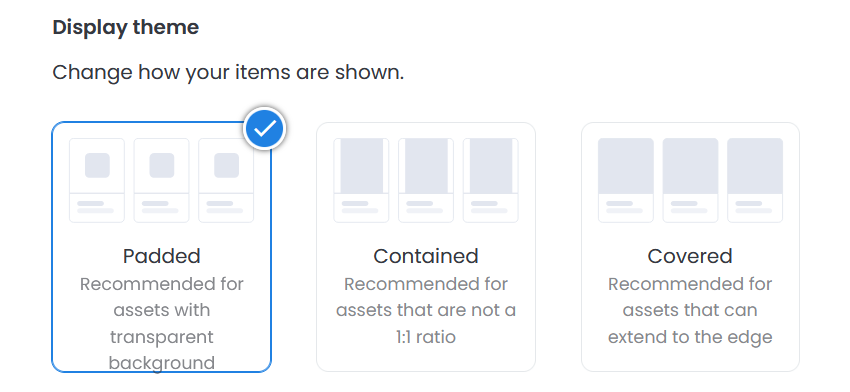
Display theme: You have three options here: Padded, Contained, and Covered. This mostly concerns how your NFTs appear in the iframe, and where the margins start to crop. You can check the below image for OpenSea’s example.
Explicit/Sensitive Content: This is just a yes/no toggle asking if your collection is going to contain sexually explicit, provacative, or violent imagery. Basically anything that might be NSFW (Not Safe For Work). General rule, if you wouldn’t want your boss to see it over your shoulder – it’s a yes.
Collaborators: Collaborators can be manually added (by address) later (not during creation), by going back to the collection screen & editing your collection. Collaborators are able to change some collection settings, so be careful, but they cannot change creator earnings payouts or addresses. They can, however, create new items in the collection & receive payments & royalties on those items.
Then, you’ll double-check everything (don’t worry; most of it can be edited later), and click Create to finalize the collection.
Creating a NFT for the Collection
As you’ll see in the above animation, you can just click Create next to the account button we used, before, in the top-right corner of OpenSea.
The options here are very similar, although you have a lot of traits & stats that you can play around with. If you’re trying to replicate the standards of a pfp project, for example, you’ll have to add all of the traits & skills or levels individually. Let’s quickly go over the list, and get you on your way to putting your own art on the blockchain.
Image, Video, Audio, or 3D Model: Wow, that’s a lot of options, isn’t it? You can actually go up to 100mb on OpenSea, and approved formats include: JPG, PNG, GIF, SVG, MP4, WEBM, MP3, WAV, OGG, GLB, and GLTF.
There’s so many possibilities here, so be sure to explore the one that best suits your particular niche. Are you a musician? Maybe mp3s, or music video NFTs as mp4s. Just be aware of the filesize, and if you need to downscale a bit, I’d probably recommend Handbrake for that.
Name: Again, self-explanatory. What is the name of this particular NFT?
External Link: Does your project or collection have a wiki, or external bios for each character or item? This is where you’d put a link for them.
Description: Again, markdown syntax is supported. Be creative!
Collection: This is a drop-down menu for selecting which collection this NFT belongs to.
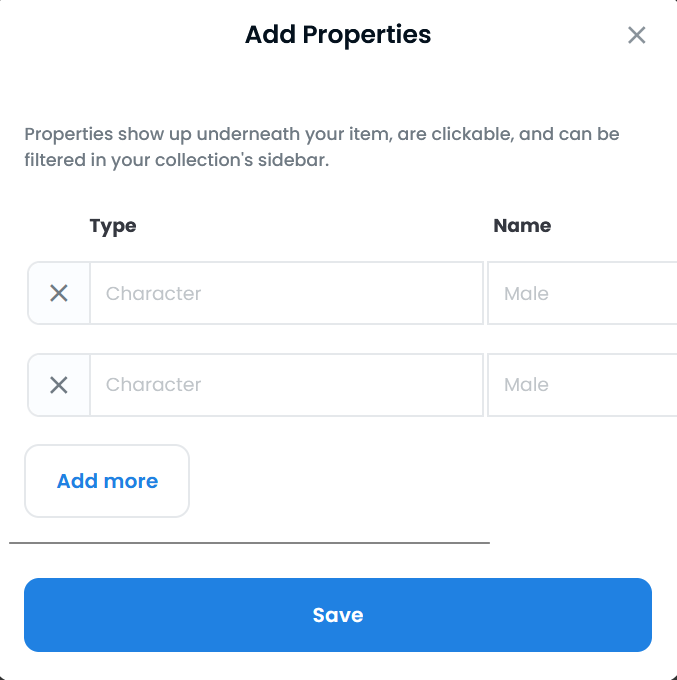
Properties: Text-based traits that show up as categories. See below for how entry & customization appear on OpenSea.
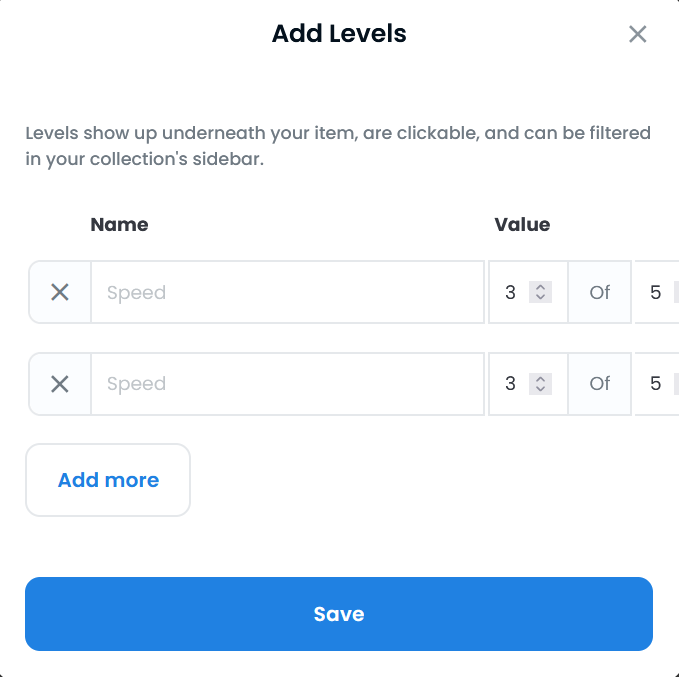
Levels: These are numerical traits. Think strength, speed, wisdom, etc. These show up as a progress bar, filled to their individual stats out of the total max values. See below.
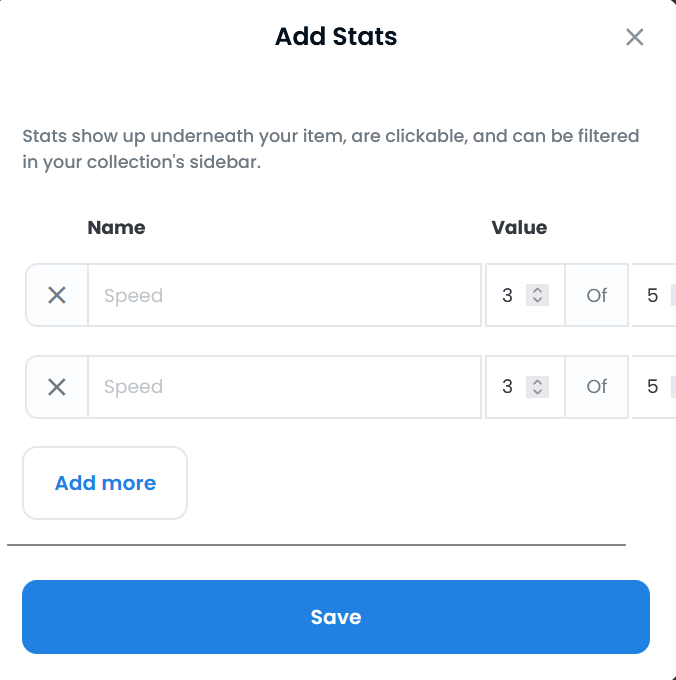
Stats: These are also numerical traits, but instead of displaying as a progress bar, they display as numbers. Essentially just a different way of displaying numerical values. See below.
Unlockable Content: This is stuff that will only display to someone who owns the NFT. You can add things like links, access codes, poetry, or whatever you like here. Again, markdown syntax is supported here.
Explicit & Sensitive Content: Same as under the collection settings. Toggle yes or no.
Supply: This is the total number that can be minted. What’s the upper limit? Who knows! It will be fun to find out, right? Regardless, this is the total possible supply for that particular NFT. Having control of the supply initially, you can always burn some, but this number will be hard-coded as the max amount in the resulting contract.
Blockchain: Again, Polygon or Ethereum? Klaytn & Solana soon?
Freeze metadata: You can’t do this during creation, but once you are absolutely certain that your NFT is precisely how you want it to be, you can freeze the metadata to permanently store the image & traits in decentralized file storage. Up until you do this, a lot of the previous options are still editable.
Be aware of that when it comes to other collections, as well.
Wow. If you got through all of that, congratulations! You’re now able to create your own Collection and then add NFTs to it on OpenSea. Be sure to check in again next week, as we’ll be continuing our trek through the history of NFTs and the basics of how we use them.
Torrent/seedbox aficionado, decentralist, cultural archivist, fundamental analyst, podcast addict, shitcoin-sifter extraordinaire
Tip Jar
BTC: bc1qahxrp47hpguhx8y8r382dekgca34tlv54aufht
Doge: DJRy9gGSUGeyXfVcZXzKLkBv7RmDLv3MhJ
Join 10,000+ forward thinkers! Get crypto education in your inbox.
We use cookies to ensure that we give you the best experience on our website. If you continue to use this site we will assume that you are ok with this.OkPrivacy policy