

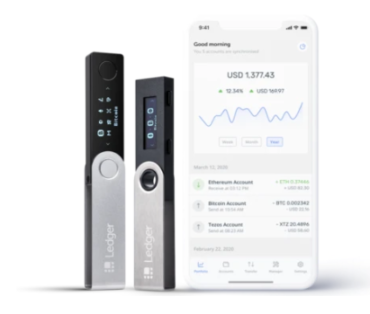
In this tutorial, we will walk through how to set up a Ledger hardware wallet to store crypto and bitcoin. The device we are using is the best-selling Ledger Nano S, the more recent Ledger Nano X is also available.
When you are ready to set up the Ledger Nano, go to start.ledgerwallet.com and follow the instructions to configure your new wallet.
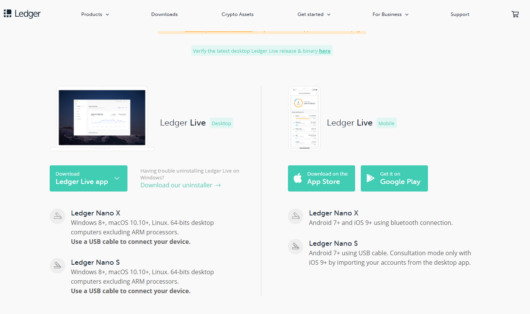
Download Ledger Live. With Ledger Live, you can set up your device and buy crypto directly. Ledger Live is available for Windows 8+, macOS 10.10+, Linux running 64-bit desktops. Ledger Live is also available for mobile devices from the Apple App Store and Google Play Store.
For this example, we are installing the Windows version on a Windows 10 64-bit PC. After you’ve downloaded the installer, run and go through the installation process. With “Run Ledger Live,” checked, select finish.
When the Ledger Live interface comes on screen, select “Get started.” If you at this point don’t have a Ledger or want to purchase another, select where it says “Buy a Ledger Nano X” to go to the Ledger store.
Read the Terms of Use and check “I have read and agree with the Terms of Use” and “I have read and agree with the Privacy Policy. Once done, select “Enter Ledger app.” Next, identify your device: Nano S, Nano X, or Blue. Again, for this example, we are using Ledger Nano S.
The Ledger Live interface will ask, “First time using Nano S?” or “Already have a recovery phrase?” If this is the first time, select “Set up a new Nano S” or scroll down and select “Connect your Nano S” or “Restore your recovery phrase on a new device.” The Ledger will take you through the basics of using a Ledger wallet.
Next, Ledger Live will take you through the setup of your wallet. You’ll want to set aside some time to complete the setup process so you are not disturbed; also, you’ll want to have a pen to write with and make sure you do not have any prying eyes around you.
Read the instructions carefully.
Step 1: Plug the Ledger into your computer
Step 2: Press both buttons at the top of the Ledger to begin
Step 3: When asked to confirm “configure as a new device?” press the button for the checkmark
Step 4: Choose a PIN code. Check the box for “I understand that I must choose my PIN code myself and keep it private.” The PIN must be between 4 to 8 digits.
Use the left or right buttons on the Ledger to select or change numbers. Press both buttons to validate a number and press the checkmark button to confirm or the x to erase a digit. After entering the PIN code, verify the PIN.
Step 5: Write down your recovery phrase on the included Ledger wallet recovery sheet.
Watch: Ledger Live Setup Video
Note of caution: As tempting as it may be, never skip or disregard the recovery phrase portion of a wallet setup. Also, avoid taking a screenshot or photo of your recovery phrase. Write down the recovery phrase and store the paper somewhere safe.
After confirming that you understand the risk of losing your recovery phrase and check the box, you can move on to the next screen on Ledger Live, recovery phrase. Validate each word in the order, they were presented by pressing both buttons at the Ledger’s top. Repeat for all of the words of the recovery phrase.
Once completed, the Ledger screen will read, “Your device is now ready.” Select the next step on the Ledger Live interface. The Ledger interface will then give you tips on how to hide your recovery phrase and Nano in a safe place.
Note of caution: Do not share your recovery phrase with ANYONE. Never give the phrase to anyone online or who claims to be from Ledger, anyone. Whoever has access to your recovery phrase has access to your crypto.
Next, select “Ok, I’m done!” and Ledger Live will bring up a three-question quiz about common misconceptions about hardware wallets. After the quiz, Ledger Live will check the Nano and ask you to connect and unlock your device. You will need to unplug and plug back in the Nano and enter your PIN code.
Once connected to the Ledger Nano, you can install apps to manage your assets. The App catalog will show a list of available assets for install, Bitcoin, Ethereum, XRP, etc. Install the desired apps to the Nano. From here you can begin sending and receiving crypto from your Ledger Nano wallet.
Ledger Nano is compatible with the following services including MyEtherWallet, Metamask, Binance DEX, Tronscan, and more. For support issues with Ledger Nano Wallets, go to the Ledger Support page. In a future article, we will look at how to send and receive from the Ledger Nano.